Clients can pay for their sessions via credit card, debit card, or HSA/FSA cards in the Client Portal.
You may also put a CC on file for automatic payment at the time of your session! Complete the Payment Authorization form to store a card on file!
As an existing client, you have access to the Client Portal where you can manage all your appointments! To cancel an appointment, follow these steps:
When canceling and rescheduling appointments, please be mindful of our cancellation policy as you may be charged cancellation fees. Our cancellation policy states $110 will be charged if the appointment is canceled less than 24 hours in advance. If you can't make it to your in-person session, you can do a telehealth (over video) session. Please reach out to your therapist to switch from in-person to telehealth via Messages in the Client Portal.
If you do not have access to the Client Portal, you may complete this form to cancel your appointment.
To quickly join your telehealth/virtual session, visit our Client Portal Telehealth. Select your Provider and Join Waiting Room. You don't need to log in to the Client Portal; however, if you want to manage your appointments, you'll need to log in.
We have multiple offices in:
View more details about these locations here.
Great question! First off, your counselor will review some of the background information in your Intake Packet. After this, you and your counselor will begin to get to know each other. One of the strongest predictors of successful therapy is the relationship between the client and the counselor. You will initially discuss what brought you to therapy and maybe some of your goals to start working on during the upcoming sessions
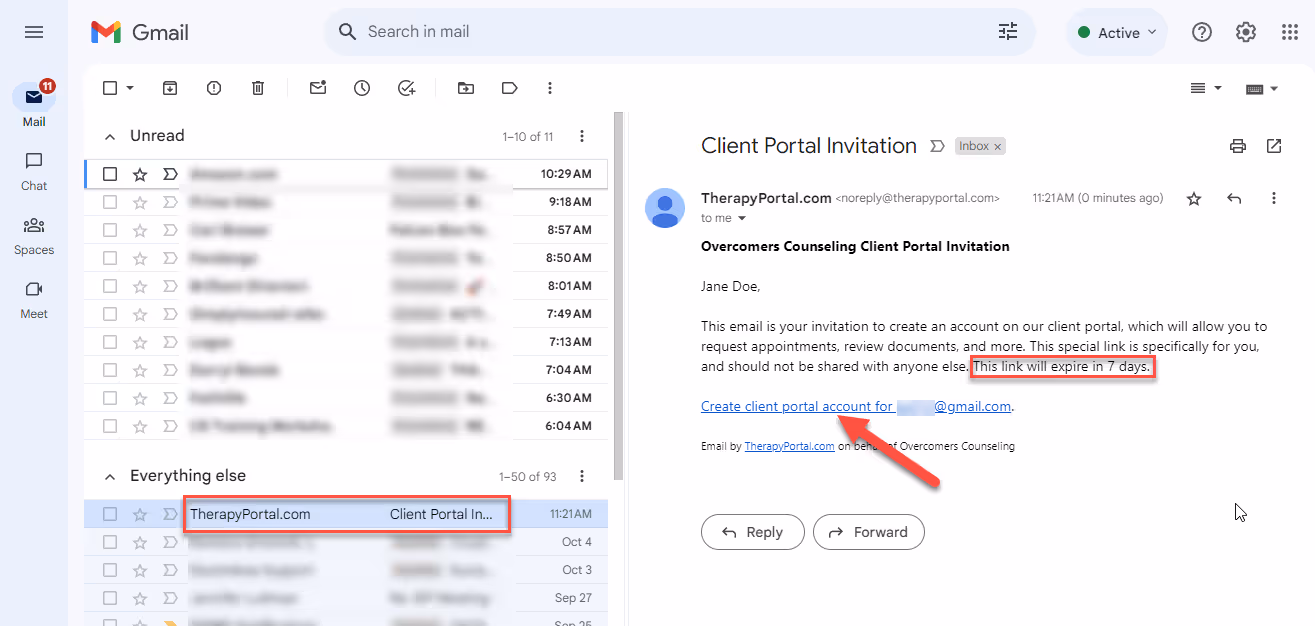
To request a copy of your mental health records, please complete this Records Request form.
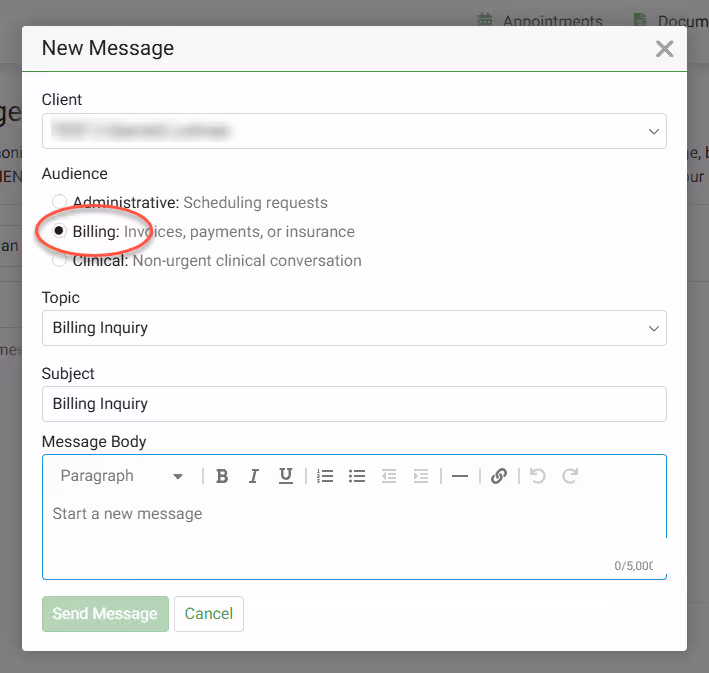
Yes, you can! In the Client Portal, you can send a message directly to your provider. Send them messages about:
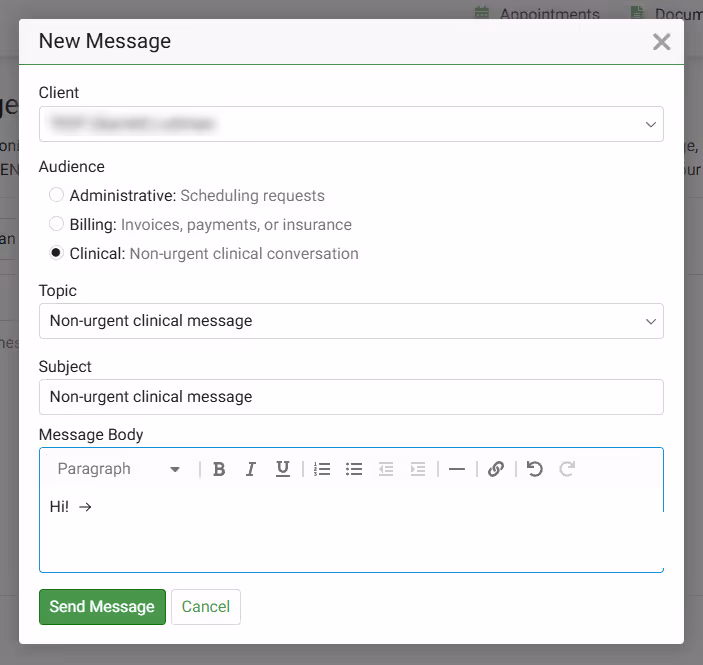
If you are unable to access the Client Portal, you can also send a message directly to your provider here.
Yes, it's essential to find a therapist with whom you feel comfortable and supported. If you find that the therapist you initially chose isn't the right fit, you can revisit your list of potential therapists and book another appointment!
Don't worry, you don't have to complete the Intake Packet paperwork again!
If the 'Welcome to the Portal' link has expired (it expires in 7 days), our support team or your provider can resend you a new link. Contacting our Support Team using any of the following methods:
Need an Rx Refill? Log into the Client Portal to notify your nurse practicioner that you need a refill.
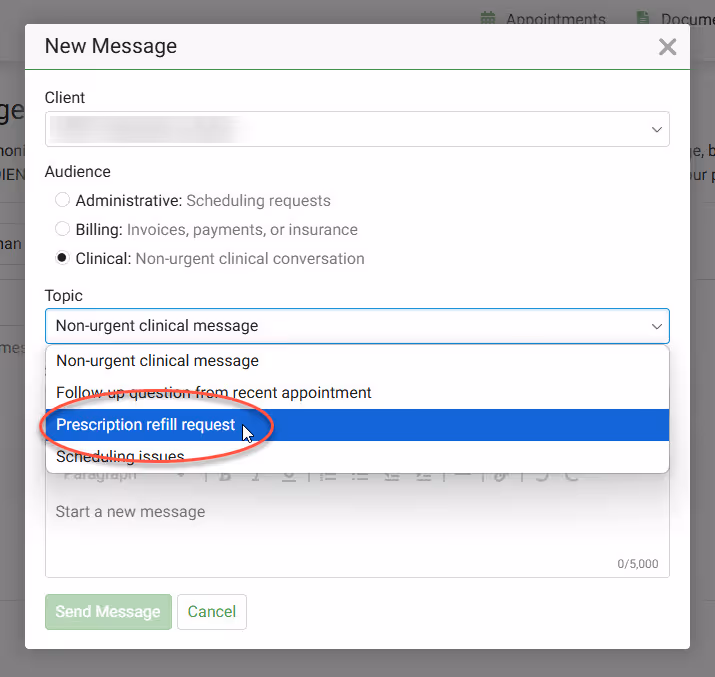
Refills of controlled substances will most often require a session with your provider. You can continue to complete the request; however, after completing the request, you can proactively take the next step and book a follow-up session with your provider.
Common controlled substances:
To update or change your insurance, follow the steps below:
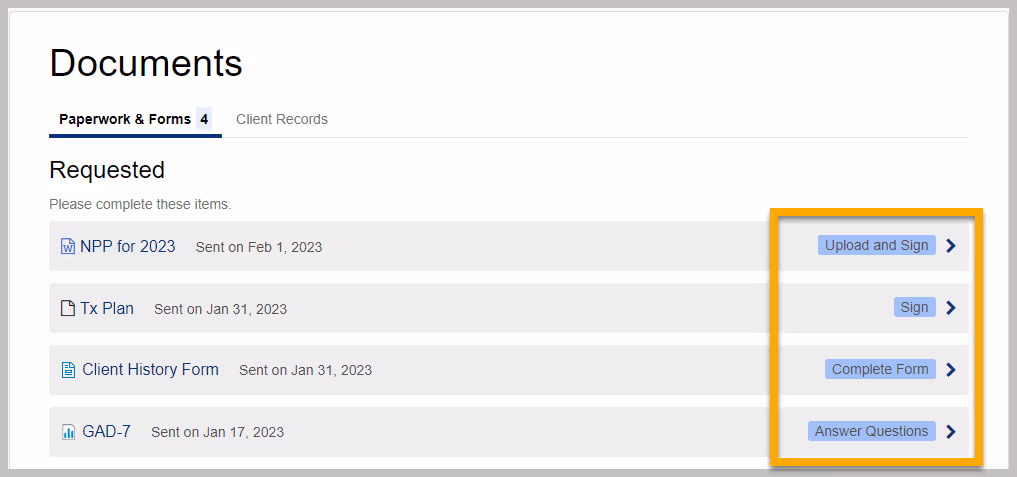
You can locate documents Overcomers' has sent you for e-sign in the Client Portal. Pending documents are shown on your homepage as well as the Documents page.
If you have records (i.e. Medical Records) that you want to send to your provider at Overcomers, you can email them at support@overcomewithus.com. You may also visit the Client Portal, click the Documents tab and then click Upload Document.
To reset your Client Portal password, follow these steps:
Existing clients have access to the Client Portal to request new sessions!
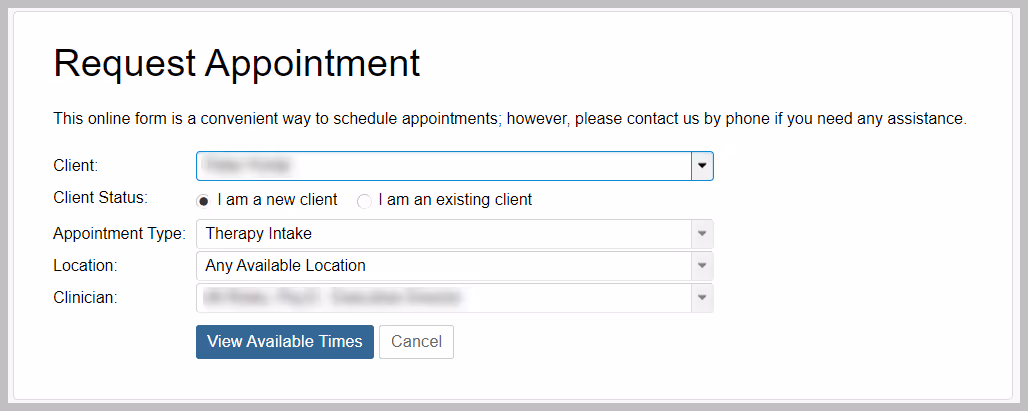
In the Client Portal you can:
Contact our Billing team and they'll send you a insurance waiver.
How to contact our Billing team:
Adding your credit card to the client portal simplifies your healthcare journey by ensuring your copays and payments are handled swiftly and securely. This not only offers convenience but also aids in uninterrupted access to essential services, making your commitment to mental health care seamless and worry-free.
Click here to access our Client Portal.
In order to use Telehealth, your web browser needs to have access to your camera and microphone. This is what allows the other participant in a video call to see and hear you. Typically, you may only need to explicitly allow access to your camera and microphone once, but the following instructions outline how to ensure therapy portal can access your camera and microphone in each major browser.
Google Chrome
By default, Google Chrome remembers when you've allowed a website to access your camera or microphone. As such, your browser shouldn't ask you for access after your first telehealth session. However, if you've accidentally blocked TherapyNotes from accessing your camera or microphone in Chrome, you can follow these steps to allow access the next time.
Click the three vertical dots in the upper right corner of Chrome.
Click Settings.
Under Privacy and security, click Site Settings.
Click Camera or Microphone.
Under Block, find https://www.therapynotes.com and click the trashcan icon.
For additional information about using a camera and microphone in Chrome, visit the Google Chrome Help Center.
Apple Safari on Mac
By default, Safari requires you to allow a website to access your camera or microphone each time it is requested. However, once you start a telehealth session and allow access to your camera and microphone in Safari initially, you can follow these steps to allow access for all subsequent telehealth sessions.
Click the video camera icon to the right of the www.therapynotes.com URL in your address bar.
In the Camera and Microphone popup that appears, click Always Allow on "www.therapynotes.com".
For additional information about changing your website preferences in Safari on Mac, visit the Safari User Guide.
Apple Safari on iPad and iPhone
On iPad and iPhone, Safari requires you to confirm camera and microphone access each time it is requested by a website. This means that you'll have to allow access each time you arrive at the dialog to select your camera and microphone as well as when you begin the video call. There isn't a workaround that we recommend for this at this time.
If you accidentally deny access to your camera or microphone in Safari on iPad or iPhone, simply refresh the page and attempt to start the telehealth session again.
If the browser doesn't request permission to access your camera and microphone, verify that you have not blocked all websites from accessing your camera and microphone in your settings.
Open the Settings app.
Tap Safari.
Under Settings for Websites, tap Camera or Microphone.
For Camera, confirm that Camera Access on All Websites is set to Ask.
For Microphone, confirm that Microphone Access on All Websites is set to Ask.
Microsoft Edge
Like Chrome, Microsoft Edge remembers when you've allowed a website to access your camera or microphone. As such, your browser shouldn't ask you for access after your first telehealth session. However, if you've accidentally blocked TherapyNotes from accessing your camera or microphone in Edge, you can follow these steps to allow access the next time.
Click the three horizontal dots in the upper right corner of Edge.
Click Settings.
In the Settings sidebar on the left, click Site permissions.
Click Camera or Microphone.
Under Block, find https://www.therapynotes.com and click the trashcan icon.
Mozilla Firefox
Mozilla Firefox offers the option to always allow a website to access your camera and microphone the first time access is requested. When you click the Start Telehealth Session button to initiate a telehealth session in Firefox, a popup will appear to request access to your camera and microphone. When that popup appears, follow these steps to always allow access.
Verify that the camera and microphone shown in the popup are the devices you want to allow access to.
Select the Remember this decision checkbox.
Click Allow.
For additional information about using a camera and microphone in Firefox, visit Firefox Support.