How to do Teletherapy Sessions
TN is our default platform for teletherapy sessions; however, alternatives such as Google Meets are available and can be used as needed.
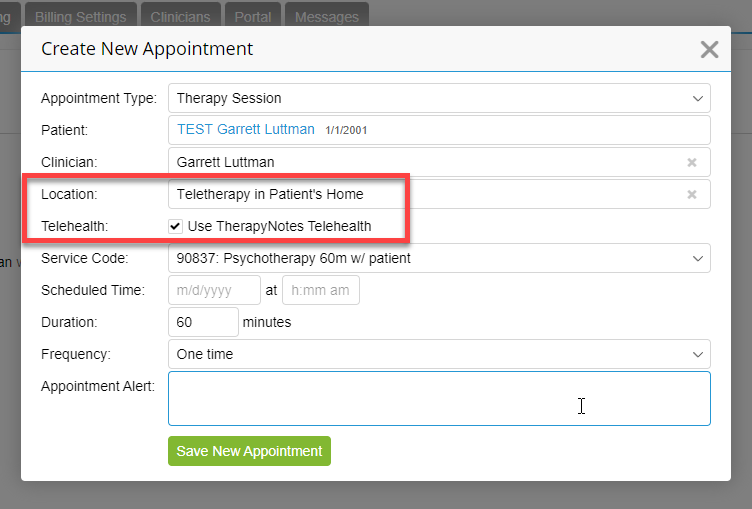
Setting Up the TN Appointment for Telehealth (VIDEO + AUDIO)
The appointment's location must be set to Virtual, and the checkbox ‘Use TherapyNotes Telehealth’ must be checked. If the appointment is set up correctly, automated appointment reminders will tell the client to log in to the Client Portal to join their session.
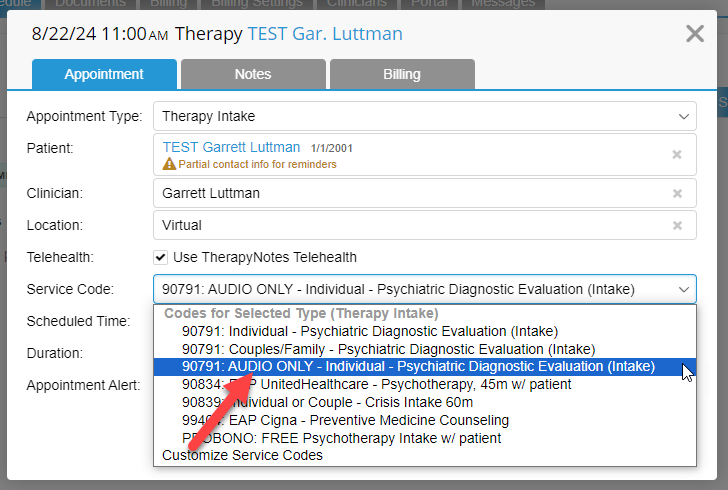
Setting Up the TN Appointment for Telehealth (AUDIO ONLY)
In the uncommon event that a client lacks access to video communication tools or encounters technical issues, it's possible to bill for an AUDIO ONLY telehealth session. Simply select the service code labeled "AUDIO ONLY." This code ensures the claim accurately reflects that the session was conducted via telephone, informing the insurance company accordingly.
Learn how to use CTM: CallTrackingMetrics CTM
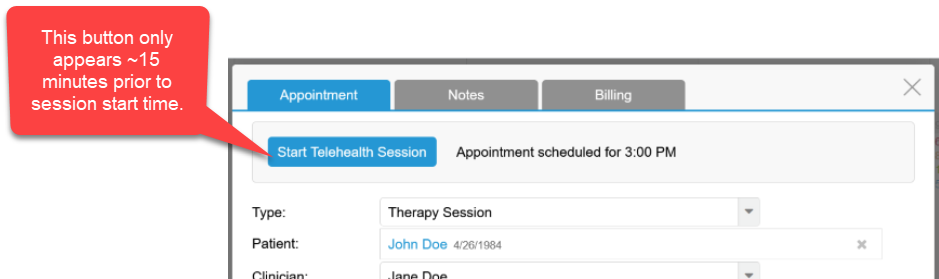
Starting the Telehealth/Video Session (CLINICIAN VIEW)
To start a telehealth session (for the CLINICIANS):
- Click on the desired appointment on the calendar.
- Your browser will prompt you to share access to your camera and microphone, click Allow.
Joining the Telehealth Session (CLIENT VIEW)
- Clients do NOT need a “link” to join their telehealth session. They use the client portal (https://www.therapyportal.com/p/overcomerscounseling/)
- The automated email reminders sent to the client will contain a link to the portal.
- The link to the client portal can also be found on every page of our website.
- Check out this video around minute 2:00 to see how Teletherapy works from the client’s perspective: How the Client Portal works.mp4
Clients can join Telehealth Sessions without “logging in” to the Client Portal. Clients can navigate to the Telehealth tab on the portal to join their session without having to remember their password to log in: https://www.therapyportal.com/p/overcomerscounseling/telehealth/
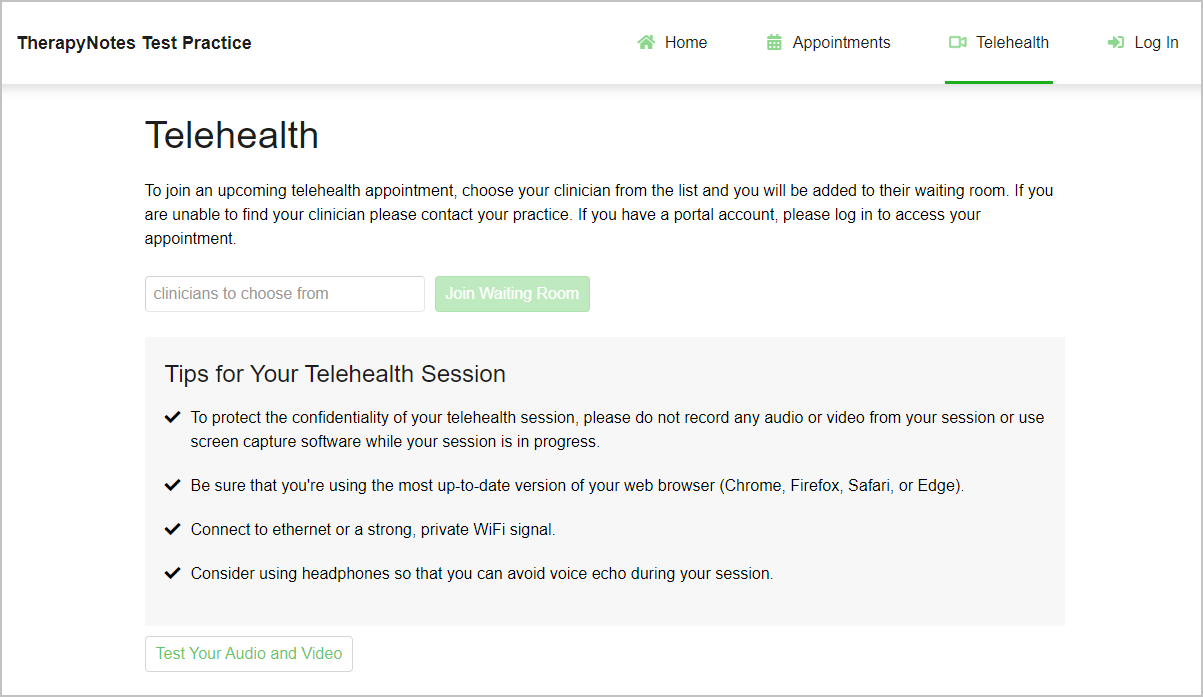
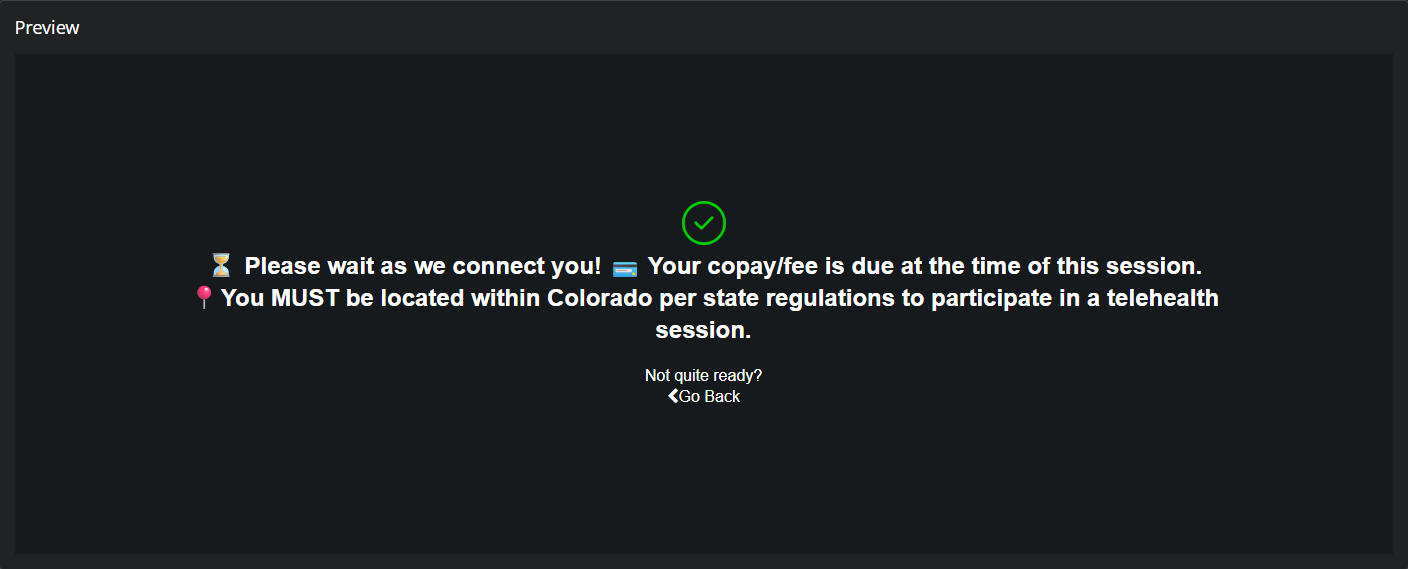
When the client joins the waiting room, this is what they see:
Tips for Telehealth
Tip: Most browsers will offer an option to always allow camera and microphone access. Selecting this option will prevent your browser from needing to request access each time you start a telehealth session. For browser-specific instructions, read How to Allow Camera and Microphone Access for Telehealth.
- In the Select Your Camera and Microphone dialog that appears, select the Camera and Microphone you want to use for your session. You should see a preview of your video and an audio meter that responds to your voice.
Tip: If no camera or microphone is detected, first verify that the device is connected to your computer, tablet, or smart phone. Next, repeat the above steps, making sure to click Allow when your browser requests access to your camera and microphone. Read Connecting a Camera and Microphone for Telehealth for additional guidance.
- Click the I'm Ready button.
When your patient is ready to join the session, you'll see a notification in the middle of your screen. Simply click the Start Session button when you're all set, and you'll be connected with your patient!
Once in a telehealth session, a small preview of your video will appear, and your patient's video will appear larger in the middle of the browser. Here's what you can do in your session:
- Reposition your video preview by clicking and dragging with your mouse, tapping and dragging with your finger on a touch device, or using keyboard controls by pressing Tab to focus on the video preview.
- Hide your preview by hovering over, tapping, or focusing on your video preview and selecting the eye icon that appears.
- Temporarily disable your camera or mute your microphone.
- Share your screen.
- End the session.
Ending the session will remove both you and your patient from the video call. If you or your patient end the session by mistake, you may rejoin the session. To rejoin a session, click the Rejoin Session button in the Your Telehealth Session Has Ended dialog that appears when a session ends. Both you and your patient must select the option to rejoin in order to reconnect in the telehealth session.
Using Google Meets (Alternative Telehealth Platform)
- Go to https://meet.google.com
- Click join/start a meeting
- Give the meeting a name (whatever you like)
- Invite people to the meeting via their email
- Use Google Meets when you need to send a video conference link to multiple people in different locations.
Best Practices for Creating a Great Teletherapy Session
You may not think of it, but a good, high-quality video stream will improve the client's experience, resulting in follow-up sessions and client satisfaction. There's nothing more frustrating than technology difficulties and poor quality. Avoid this, "what did you say?? You cut out!"
Here are some best practices:
- Good internet. Plug your computer directly into your home modem for internet with a Ethernet cable. Try and not use wifi (if possible). Wifi can be unstable from time to time and would result in poor quality, dropped connection and/or freezes.
- Go to https://fast.com/ to test your internet speed.
- After it runs a speed test, click “more details”
- Minimum UPLOAD speed should be 10+ mbps for a great connection
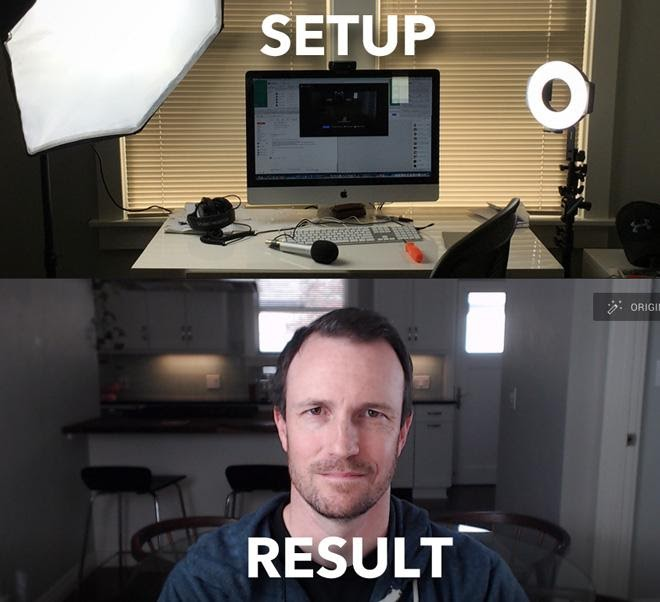
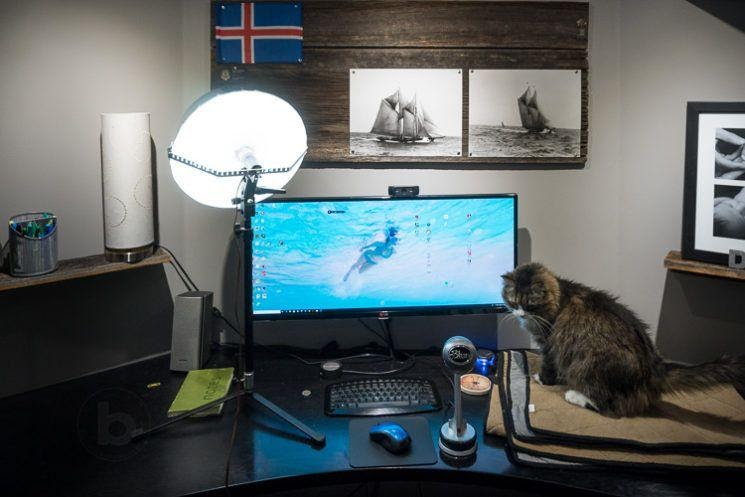
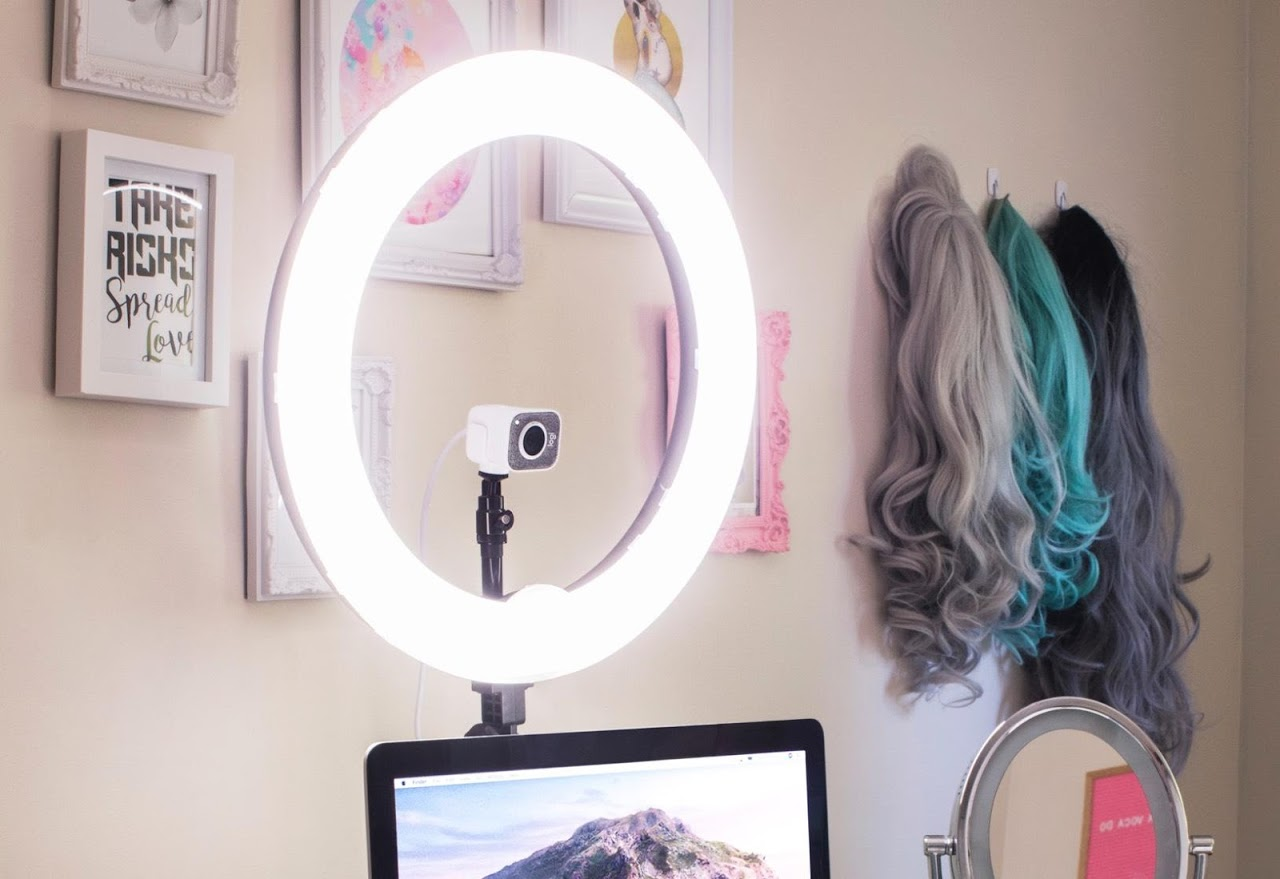
- Good lighting. This one is probably most important and can result in a night and day difference. See the images below for creating great lighting. Here an example light you can purchase from Amazon.
- Good audio. An external USB mic like this one is great, click here.
- Good webcam. Most modern laptops have a camera that will shoot in 1080p but if you don't have that, try and purchase a USB Logitech camera.
See some example below:
Troubleshooting tips for you or your clients
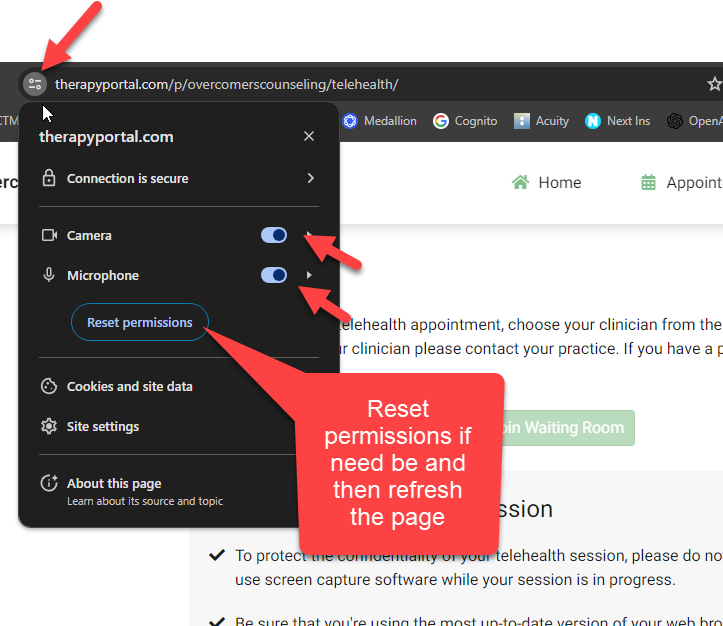
Can’t get my microphone or camera to work?
- Make sure the camera and microphone are set to On.
Teletherapy Across State Lines
- COVID-19: Is it legal to treat clients in another state?
- Telehealth guidance by state during COVID-19