Cognito Forms
Cognito Forms is Overcomers' form builder. Form builders make it easy to collect and display data (aka submissions or entries). Cognito has many robust features that can trigger many automations, workflows, actions and more.
Who has access?
The Support Team is the only user group with access to the 'backend' of Cognito, where they view all entries and trigger actions. Clinicians and other staff members can only trigger actions based on the form setup and their role assigned within the form.
Creating forms
Only Garrett can create forms and manipulate the workflows within the form.
Entry Management (Views)
Think of 'entry management' (or Views as they are called in Cognito) as a spreadsheet of all the submissions of a form. Each entry (or submission) contains the data from each field and some additional action steps based on the form. We can create multiple Views with filters to organize and display entries efficiently.
Creating entry views
For the most part, the Support Team does not need to create different Views. The Views that have already been set up are sufficient. However, you can make a View by doing the following:
Once you make a change to the current entry view (like displaying different columns or sorting/filtering entries), you can click Save to save those settings as a unique entry view. Create up to 16 different entry views per form, and then toggle between each view as needed.
To create a new entry view:
- Open the Entries page for your form.
- Select the All Entries dropdown and then select + New View.

- Customize the entry view name, columns, and sort/filter options.
- Select Save to save your new entry view. To set this view as the default view for your Entries page, drag the entry view to the top of the list.
Downloading documents & files
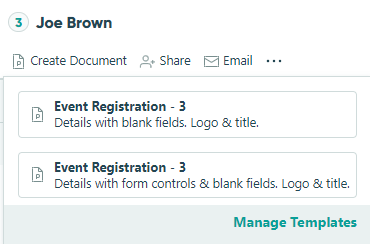
Support Team can download PDFs of the entry, which can then be uploaded to another program. To download documents from individual entries:
- Open your form’s Entries page.
- Open an individual entry and select Create Document.
- From the dropdown, select the document template you want to generate.
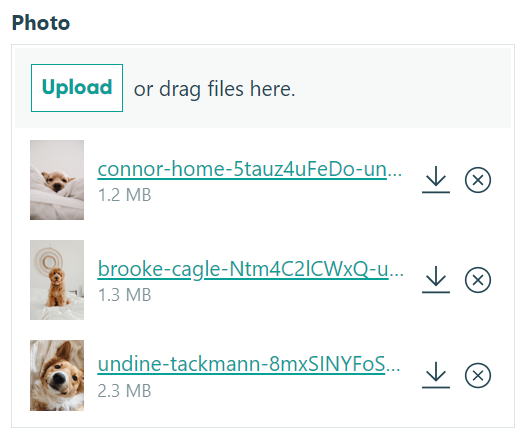
Download files submitted on the entry
To download files one at a time:
- Go to your form’s Entries page and click on the entry that you want to download files from.
- In the entry details, find the File Upload field, then click the download icon to save the file directly.
- Repeat the steps above for each file.
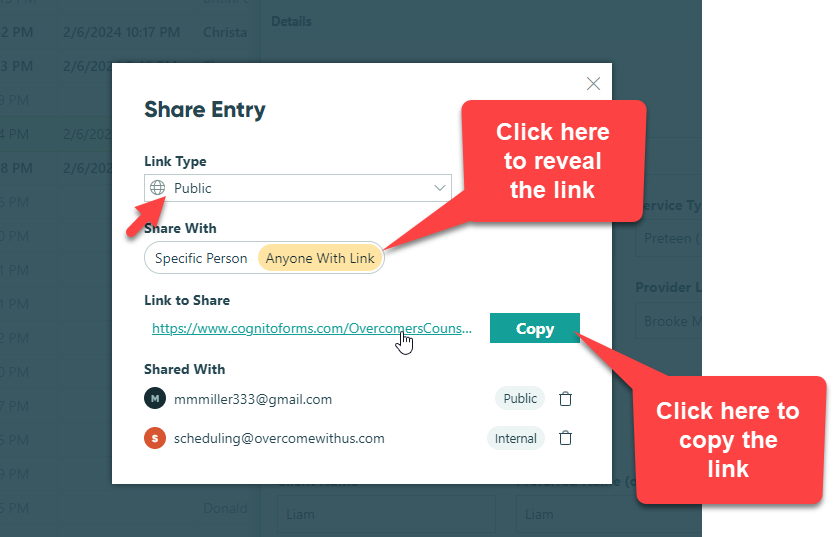
Sharing a link to an entry
You can use the Share function at the top of an entry to send an email including a link to the entry quickly, or simply copy the link to the entry to share it.
- From the Entries Page, open the entry you’d like to share.
- Click Share at the top of the entry.
- Specify the Link Type. These options are based on the roles in your form’s Workflow menu.
- Determine whether you’d like to send an email or share a copied link to the entry.
- To send an email, select Specific Person under Share With and enter the recipient’s email address. Click Share to send the email. The email notification template is located in the Workflow menu on the Build Page.
- To share a copied link, select Anyone With Link under Share With. Click Copy and then paste the link as needed.
Managing shared links
Under Shared With, view all the people you’ve shared the link with (including their workflow role and/or link expiration date). This list only includes people that received the link via email.
Once a link expires, it will be automatically removed from the list. To manually revoke access to a link, select the trashcan icon next to the link role and hit the Stop Sharing button.

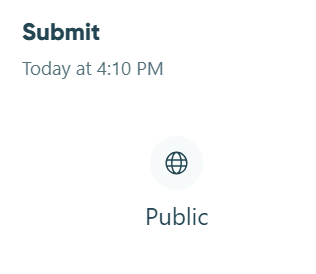
Auditing entries, viewing the history
Every entry you collect in Cognito Forms contains an activity log, which includes the complete history of the entry in chronological order. The activity log enables you to see who performed an action on the entry and when it occurred, track payment history, view email delivery status, troubleshoot any errors associated with the entry, and more.
Viewing the entry activity log
To view the activity log for an entry:
- Open the Entries page for your form.
- Open an individual entry and find the Activity section.
- Select an individual event (Submit, Update, etc.) to view the full details, such as changes to entry status, payment activity, emails and integrations.

Auditing users
Actions can be performed by:
- A user logged into Cognito Forms. Their name, email address, and workflow role will appear in the log.
- People involved in your form’s workflow. Their email address and workflow role will appear in the log.
- An anonymous user. Their workflow role will appear in the log.
- An integration like Make, Microsoft Power Automate, Zapier, JSON webhooks, or Google Analytics.
- A payment provider like Stripe, Square, or PayPal.
If a user deletes their Cognito Forms account, their name and email address will be removed from the log. When a user updates their profile information (name, email, avatar, etc.), the audit log will display the most recent changes.
The activity log displays all actions associated with the entry, as well as who performed the actions and when they occurred (based on your own time zone).
ActionDetailsWorkflow Action (Cognito Forms User)
View when a Cognito Forms user performed a workflow action on the entry.
Workflow Action (Shared Link)
View when a user who received a workflow link via email performed a workflow action on the entry.
Workflow Action (Anonymous Link)
View when an anonymous user performed a workflow action on the entry.
Workflow Action (Integrations)
View when an integration was triggered, the delivery status of the integration, and if the integration failed and why.*
Save (Cognito Forms User)
View when an entry was saved and which Cognito Forms user saved it. The activity log records one save per one hour time window.
Save (Anonymous Link)
View when an entry was saved by an anonymous user.
Change Status
View changes to an entry’s status.
Import
View when the entry was imported from an Excel spreadsheet.
Submit Payment
View when payment was submitted to the entry.
Refund Payment (in Cognito Forms)
View when an order was refunded and which user initiated the refund.
Refund Payment (in payment provider)
View when an order was refunded within the connected payment provider.
Copy
View when the entry was copied from an existing entry.
Update Quantity
View when a quantity limit on the entry was updated.
*Users with Owner or Administrator permissions can view the full integration status details.
Email delivery status
The activity log records details for all emails sent by the entry, including which workflow action triggered the email, the full text of the email, and the files or generated documents attached to the email.
Delivery StatusDescriptionSending
Our email provider is in the process of sending the email.
Delivered
The email was accepted by the recipient’s email server.
Soft Bounced
The email wasn’t delivered due to a temporary problem. Soft bounces can happen because the recipient’s inbox is full or due to an issue with the receiving server.
Hard Bounced
The email can’t be delivered for permanent reasons. A hard bounce typically occurs because the recipient’s address is invalid or no longer in use. In this case, our email provider will stop attempting to deliver the message and subsequent email to that address will be temporarily rejected.
Rejected
Our email provider rejected the API request to send the email. Typically, emails are marked as rejected to help maintain a good email sender reputation.
Spam/Complained
The recipient marked the email as spam. In this case, any subsequent emails will be rejected.
Integration delivery status
Review all actions related to data integrations, including when an integration was triggered, the delivery status of the integration, and if the integration failed and why.
Delivery StatusDescriptionDelivered
The integration was sent successfully.
Pending
The integration has been queued but not yet sent. Or, the integration is being retried. If our system receives a 4XX or 5XX response, we will initiate a retry mechanism, resending the webhook event up to 30 times over a 72 hour period. We do not retry 404 (Not Found) and 410 (Gone) responses for our integrations with Make, Power Automate, and Zapier.
Failed
The integration delivery failed and will not be retried.